

Aiming Features in Cinemachine
This article covers most of the aiming features that come with using a Cinemachine virtual camera.
To get started, let’s take a look at the Follow and Look At functions.

The Follow function uses the target position to move the position of the camera to pursue it, so it will always correspond with the Body. The warning sign here tells us that we need to have a target to follow for the Body to work.

The Look At function changes the rotation of the camera to face the target.

For this reason, the Look At will always be associated with Aim, and we get a similar warning when there is no Look At target assigned.

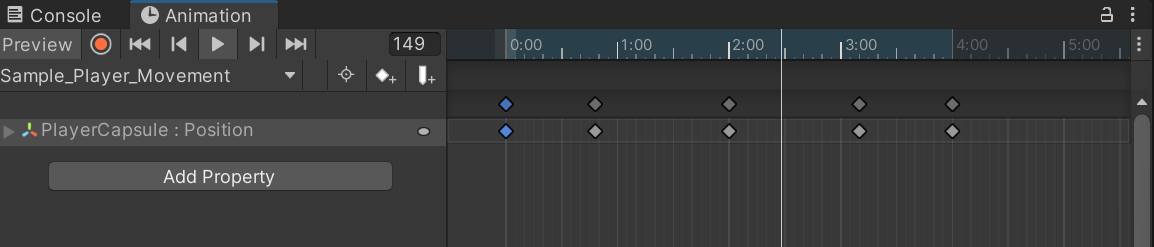
To demo the Aim functionality, I want some regular movement for the target, so I make a simple animation for the player to move about the screen.

The animator component is assigned to the player capsule.

The animation is a simple moving reposition of the player, taking it in a rough circular movement.
Here you can see the animation in the scene view.

Here it is again in the game view, coming through the virtual camera being used for this article.

With the virtual camera selected in the hierarchy, the target player capsule is assigned to the Look At function by dragging it in from the hierarchy.

Now the camera will continuously rotate towards the player target. The main problem here is that the camera view is undesirable. The camera is using the center of the target as the point to track, which is typically not a good look. This is where the variety of Aim options comes into play!

Aim
While there are a few varieties of Aim options available, I will be covering the Composer option in this article.

Composer
There are over a dozen useful options here, so let’s go over them slowly.

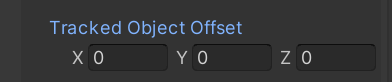
Tracked Object Offset
The Tracked Object Offset is great for moving your target off-center. Most of the time, visually speaking, we don’t want the camera to center the target and follow it perfectly. This will feel rigid and be not so visually appealing. The Offset option holds values to offset the target on the X, Y and Z axes.
Here I offset the target to the right on the X axis, and then brought the camera view up on the Y axis so the camera isn’t looking right at the belly of the target.

Here is the result of that offset. The yellow dot shows the center of the camera, while the target is offset on the X and Y axes.

Now the camera rotates towards the player with an offset to the right, and doesn’t clip off the head, because of an offset on the vertical Y axis.

Lookahead
The above gif is subtle, but shows the camera tracking just behind the player’s movement. Basically, the player begins moving before the camera moves to track it, so the camera is always a little behind. Depending on how fast your player is moving or what is in front of them, this could be a problem. The Lookahead Time option tells the camera in advance, what direction the player will be moving in, so the camera has a chance to move ahead of the target, rather than behind it.

You can see here how the yellow dot moves ahead of the player, with the Lookahead Time engaged.
Depending on the movement, this can get a rough camera feel. The Lookahead Smooth option can be used to smooth out a rough Lookahead Time tracking.

Now the camera movement is still ahead of the player, but the transition of movement is much smoother.
The Lookahead Ignore Y is only used for top-down games. Because the Y-axis is the vertical one, this can become problematic when looking straight down it from above in an overhead game format.

Damping
The Horizontal and Vertical Damping are used to add a delay to the camera tracking. Because these have what appears to be a somewhat opposite effect as the Lookahead function, it is recommended to use them both together for the best overall effect.

Here is the player animation with a but of damping added.
I increase the Lookahead Time and Smoothing values to work with the new Vertical Damping value.

Now the camera still moves ahead of the player, but the overall movement and target tracking is much smoother.

Screen X and Y
The Screen X and Screen Y options will offset your target area. They are similar to the Tracked Object Offset, only these controls will move the Game Window Guides and everything with it.

Let’s reorient the Screen X option as an example.

Here you can see that the guides are moving and not just the player offset. The Tracked Object Offset is set to zero for this demo.
Dead Zone
The Dead Zone adds an area in the center of your Game Window Guides where the camera will be unresponsive to the target.

Here is a gif of me increasing the dead zone height and width values.

Now with the dead zone in the center, the camera will not start following the target until it has reached the end of the dead zone!
Soft Zone
The Soft Zone Width and Height work in an opposite fashion as the dead zone, and also work with the outside edge of the camera view (outside of the guides).

Here I am adjusting the Soft Zone Width.
Now as the target comes into contact with the Soft Zone threshold, it forces the camera to start tracking the target. This is especially handy with fast moving targets or a necessity to keep the target away from the edge of the screen.
Bias X and Y
The Bias X and Y options work similarly to the Screen X and Y options, only rather than moving the entire Game Window Guide, it will offset it to have more bias to an assigned direction.

Here you can see that the bias has been increased to the left on the X axis, without affecting the typical boundary on the right.

Thanks for joining me on this journey through aiming at targets with cinemachine in Unity! I hope you join me in the next installment about changing between virtual cameras.

